In the previous article, I already discussed how to create and export Microsoft excel files using X++ programming in D365 F&O. In this article I am showing how to import data from excel files using X++ code in D365 FO.
The management and integration of Microsoft Dynamics 365 with Microsoft 365 products or Office 365 products are very good, especially with Microsoft Excel.
But there are many situations in our development, there we need to write the x++ codes to import excel files and to manipulate with the excel data. These requirements may be special and does not available with the standard integration.
For this reason, I have written this article to get the basic coding concept to import an excel file and read the excel file using X++ coding.
I have written the codes under Runnable Class (Job), which helps the learners to understant the code easily. Before writing x++ codes I have created a Model D365SnippetsModel, under this model i have created one project ImportExcelProject. Then added one new Runnable Class (Job) ImportExcel.
Important
Before writing the logic for importing excel records we have to add the required names spaces and reference packages, because exporting excel related x++ classes and methods requires the below names spaces.
Using System.IO;
Using OfficeOpenXml;
Using
OfficeOpenXml.ExcelPackage;
Using OfficeOpenXml.ExcelRange;
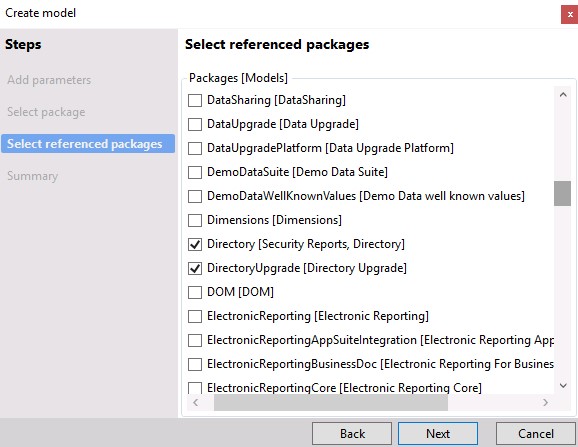
In addition to the basic reference packages, we also require to add some additional reference packages Directory.
Part 1 Code
In part 1 code, create a dialogue object which will work as an import form, and you can select the excel file by clicking the import button, Once the file is fully uploaded it will keep the data in temporary storage.
Part 2 Code
In part 2 code, get the data from imported excel and get the
row count to iterate the records to fetch all the records from excel. In each iteration
the data is got and the data is put into the Info method.
After creating the model, project and Runnable Class , You can copy the below codes and paste the codes between the main method of the runnable class.
Using System.IO;
Using OfficeOpenXml;
Using OfficeOpenXml.ExcelPackage;
Using OfficeOpenXml.ExcelRange;
class ExcelReadRunnableJob
{
/// <summary>
/// Runs the class with the specified arguments.
/// </summary>
/// <param name = "_args">The specified arguments.</param>
public static void main(Args _args)
{
/*---------part 1 ------------------
System.IO.Stream stream;
ExcelSpreadsheetName sheet;
FileUploadBuild fileUpload,fileUploadBuild;
DialogGroup dialogUploadGroup;
FormBuildControl formBuildControl;
Dialog dialog=new Dialog("Excel Import Example");
dialogUploadGroup=dialog.addGroup("@SYS54759");
formBuildControl=dialog.formBuildDesign().control(dialogUploadGroup.name());
fileUploadBuild=formBuildControl.addControlEx(classStr(fileUpload),"UploadExcel");
fileUploadBuild.style(FileUploadStyle::MinimalWithFilename);
fileUploadBuild.fileTypesAccepted(".xlsx");
if(dialog.run() && dialog.closedOk())
{
FileUpload fileUploadControl=dialog.formRun().control(dialog.formRun().controlId("Upload"));
FileUploadTemporaryStorageResult
fileUploadResult=file::GetFileFromUser(classStr(FileUploadTemporaryStorageStrategy));
//fileUploadResult=fileUploadControl.getFileUploadResult();
/*------------------part 1 end---------------------*/
/*------------------part 2---------------------*/
if(fileUploadResult!= null && fileUploadResult.getUploadStatus())
{
stream=fileUploadResult.openResult();
using(ExcelPackage package= new ExcelPackage(stream))
{
int rowCount, iterator;
package.Load(stream);
ExcelWorksheet worksheet= package.get_workbook().get_worksheets().get_Item(1);
OfficeOpenXml.ExcelRange range=worksheet.Cells;
rowCount = worksheet.Dimension.End.Row - worksheet.Dimension.Start.Row + 1;
for(iterator=2;iterator<=rowCount;iterator++)
{
Info(range.get_Item(iterator,1).Value);
Info(range.get_Item(iterator,2).Value);
Info(range.get_Item(iterator,3).Value);
}
}
}
/*------------------part 2 end---------------------*/
}
else
{
Error("error occured.");
}
}
}
After pasting the code, building, and running the project, a browser will open which will open a dialogue window to import the excel file, you can import the excel file by clicking on the import button,
Here I have created one excel file named "Customer Data.xlsx". Which have three columns "Customer Code", "Customer Name" and "Customer Address" as shown below figure. In your virtual machine, you create one excel file with the required columns and put some records in each column.
In the browser you can find the import dialogue box, for better practice we can use this method, another method is you can put the excel file path in x++ code.
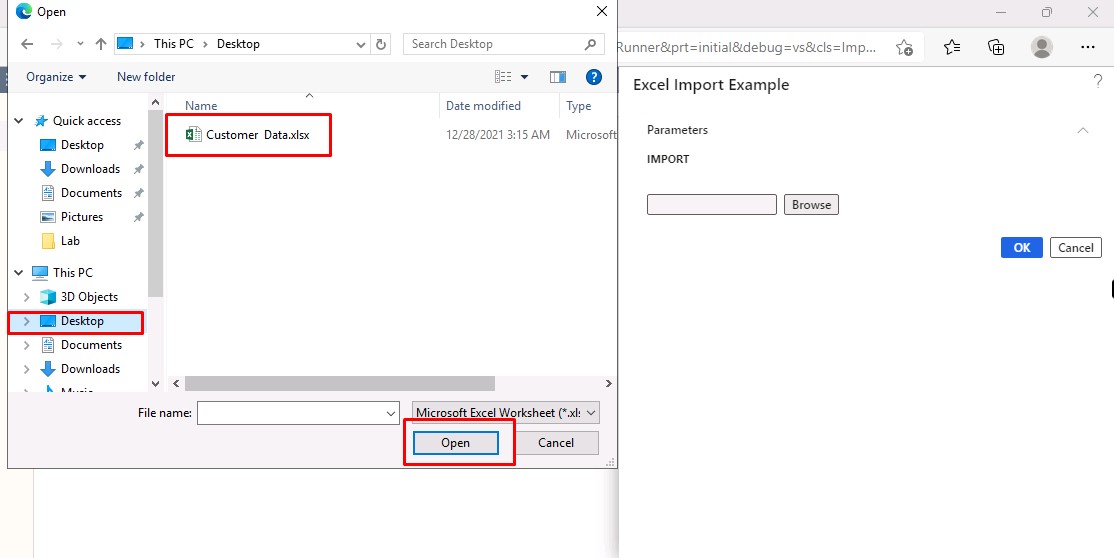
After clicking the import button, a file chooser dialogue will open, then you can choose your already created Customer Data.xlsx file.
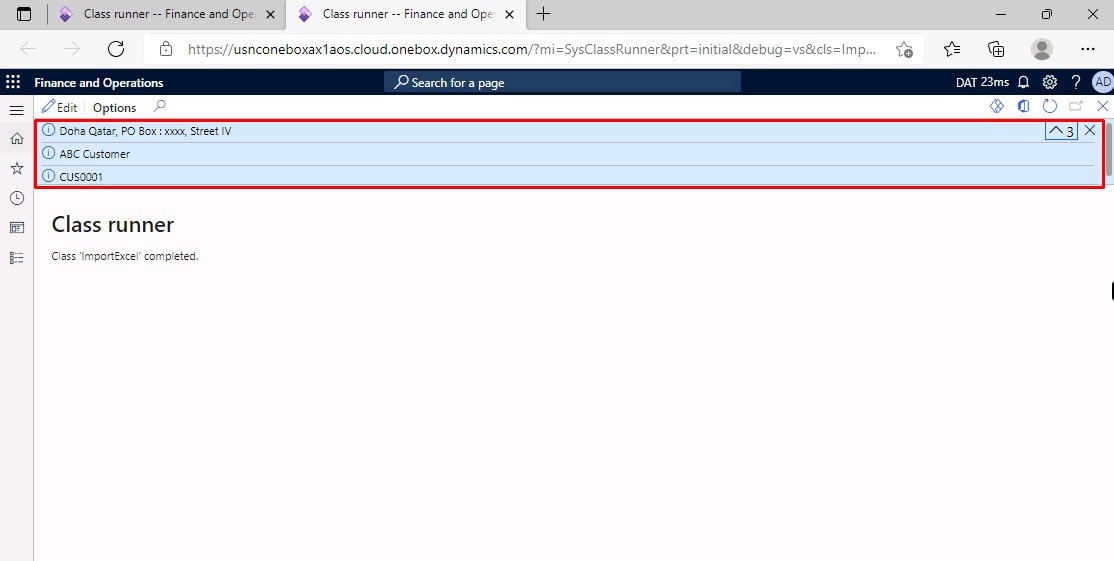
Then you can see the output of the Code, The Info method displays output, which shows the excel column values Customer Id, Customer Name & Customer Address.If this post is useful try to share it on social media, Writing x++ code for importing excel data in d365 f&o is not a hard task, but the complexity of coding will increase if the requirement is complex. I wrote this article for d365 FO beginners and learners.
Happy coding with D365 Snippets.
Some Useful Links
Useful Tags
How to read excel data using x++ code in d365


Hi Rafeeque, Thanks for this blog. When i tested this, I found that the file import dialog is coming two times. and its because of (FileUploadTemporaryStorageResult
ReplyDeletefileUploadResult=file::GetFileFromUser(classStr(FileUploadTemporaryStorageStrategy));) this code.
just letting you know.
How to fix it? thank you
Delete